PDF Editor Suite
+
ChatGPT

Summarize. Rewrite.
Translate. Ask!
AI assistance for increased productivity.

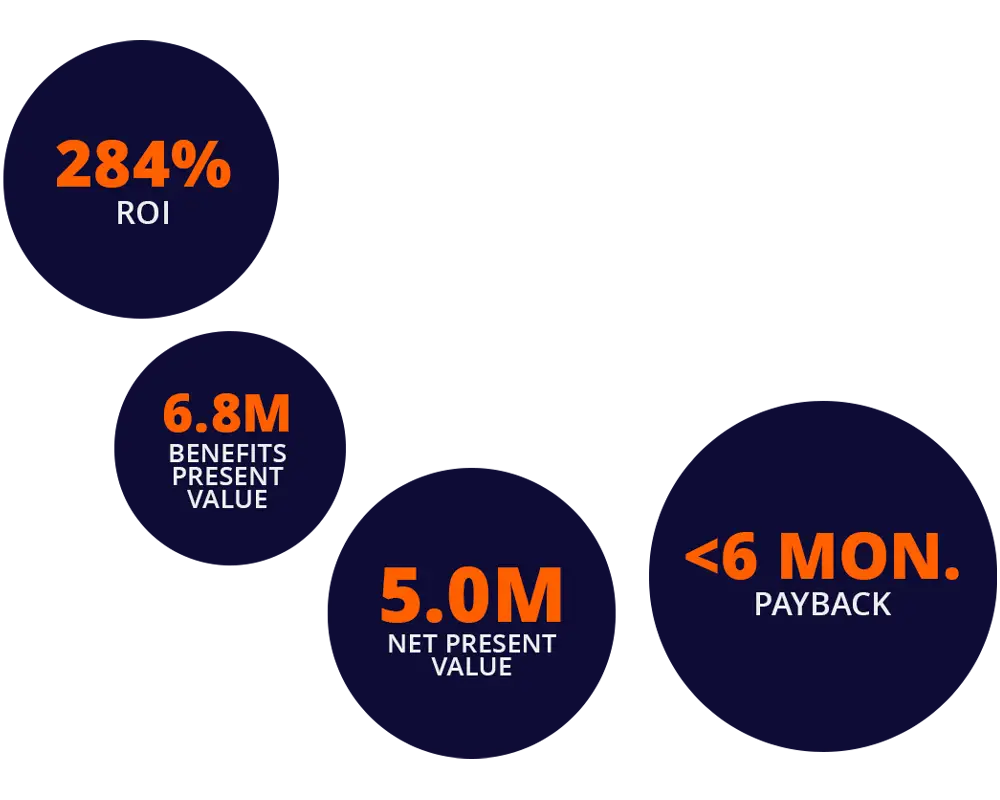
Total Economic Impact™ by Forrester®
Understand your individual 3-year ROI of switching from legacy PDF Software to Foxit PDF Editor.